Showing posts with label school website. Show all posts

Friday, September 12, 2014

SharpSchool Columns

Is your web page looking a little drab?  Try moving around your portlets and adding columns!


Moving Portlets
Place your cursor over the arrow in top left corner of the portlet.  When the cursor turns to cross-hairs, you can click and drag the portlet to a different place.


Adding Columns


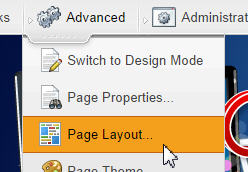
1.  Under Advanced, click Page Layout


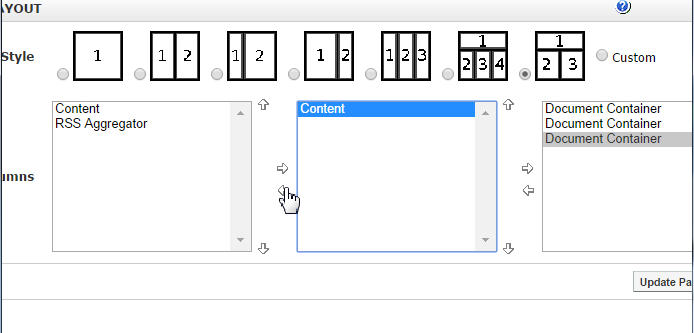
2.  Chose the layout you like.


3.  Use the arrows to move your portlets into different columns


4. Click Update Page.

SharpSchool Upcoming Events Portlet

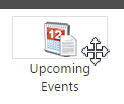
Upcoming Events Portlet

1.  Under Advanced, Click Switch  to Design Mode    

2.Find the Upcoming Events portlet under the collaboration tab and drag it to a place on your page.
3.  Connect the portlet to your calendar (or any other school calendar)
  • Click edit on the Upcoming Events portlet
  • Next to the place for a calendar name, click browse
  • Use the + signs to open and search for the calendar you want


Friday, September 5, 2014

What Should You Put On Your Website?

How do you get parent's to visit your website? One way is to keep the information fresh and relevant. Post, Post, Post!


Need some ideas to jazz up your website? Try adding a portlet for one of the ideas below.


Due Dates  (Upcoming Events Portlet)
Need everyone to bring back a permission slip by Wednesday? A book report due Friday? Add an “Upcoming Events” portlet to your page and everything you add to your calendar will be featured!
Relevant links (Document Container Portlet)
Links for students to learn more about content and links that make your subject more fun.
Notes Home (Document Container Portlet)
Anything important that you hand out in class can be posted online.
Class Rules and Guidelines  (Content Portlet)
Homework (Document Container Portlet)
Upload homework so no one has the “I forgot it at school” excuse!
Biography (Content Portlet)
Tell parents about your academic and professional background.
Your Favorite Sites (Document Container Portlet)
Share the educational sites or student-centered sites that you visit the most.
Information for Parents (Document Container Portlet)

  • Links to relevant parenting or educational articles/websites
  • Links for educational websites that can be used with their children
  • Tips for helping their children succeed in school
  • Information about the units you are teaching and the standards you are focusing on currently.

Thursday, August 28, 2014

SharpSchool - Customizing Themes

Add your name and job title to the theme of your webpage!


  1. Sign in to your website.
  2. Under Page Properties, click Metadata…>General metadata

  1. Type your name In Theme/Header Line 1
  2. Type your job title in Theme/Header Line 2
  3. Click Submit


  1. Close the box and refresh your page!

Friday, August 22, 2014

SharpSchool Document Container

A Document Container portlet can hold all your links, files and folders!


To add a document container portlet you must first Switch to design Mode


After switching, you will see this portlet toolbar towards the top of your screen.


Simply click and drag the icon of a portlet to the spot you want it on your page! Watch Video

Once you have inserted the portlet you can fill it up!
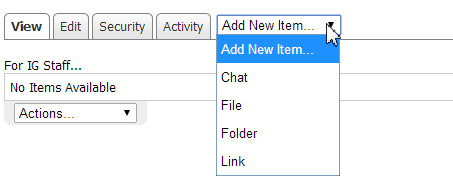
Add New Item… File
Click Choose File and upload something from your computer!
Add New Item… Folder
Create a folder to help organize your container!

Add New Item… Link
Add a link to a website, video or google doc!


SharpSchool Container Portlet - Clip Art & Images

Here are two ways to add images to the content portlet on your web site.  (A content portlet is a web part that allows you to type/format text and insert images.  When editing the portlet, it gives you most of the same options as when you create a word document!)  You ALREADY have a content portlet on your site… it is the part where you can type your name!
To edit ANY portlet, you must first Switch to Design Mode and then click the portlet's edit button.


Option 1 - ClipArt
SharpSchool offers a clipart library. Just click where you want the image, click the clipart button and search their library!


Option 2 - Uploading and inserting your own picture!

  1. Click the Image Manager icon
  2. Double-click the folder with your name on it (No folder?  Contact Sondra!)
  3. Click  
  4. Click
  5. Choose the image you want to upload from your computer and click the Open button
  6. Click the
  7. The image you chose will be uploaded into your folder
  8. Select the image you want to insert by clicking on the file name
  9. Click the Properties tab
  10. Enter a 1-2 word description of your picture in the ALT Text field.
  11. Lock the ratio aspect by clicking closed the little lock
  12. Enter the Width at 300 (you can click and drag to the size you want later)
  13. Click the Insert button
  14. Resize your image as needed